|
Starting with version 2.3.1 Final and higher, H-Sphere comes with Virtual Private Server support.
It offers a series of advantages and privileges in that you get your own Linux server with root
access, whereas in regular user accounts you could only request non-root access from the administrator.
You can do the following in your user control panel:
Checking Virtual Server Status
Such as installing Virtual Server takes a while, VPS will not be activated right away after
signup. Until it gets activated, you can view only billing info and trouble ticket system in your user control panel.
To make sure that VPS is activated and can be administered, you can check the VPS status:
- On the user control panel home page, select Server Info from the Virtual Private Server menu.

- If you need to restart VPS, click the Stop it link. To activate it later, click the Start It link.
Add Custom DNS Records
To configure DNS zones and add custom DNS records:
- Select VPS DNS Zone in the Virtual Private Server menu. The following page shows:
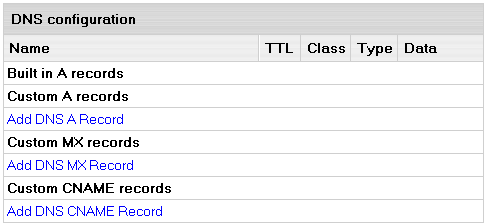
- To add a custom DNS record, click the link in the necessary DNS record section.
Change Root password
You can log into your virtual server with a root password. In case you want to change it, do the following:
- Select Root password in the Virtual Private Server menu.

- Enter a new password and confirm it again.
- Click the Change Edit button.
Add VPS IP.
You can add more IPs to your virtual server:
- Select Server IPs in the Virtual Private Server menu.
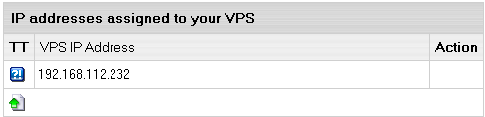
- To delete existing IP, click the Trash icon next to it.
Change Server Limits.
You can increase or decrease server limits in the user control panel:
- Select Server limits in the Virtual Private Server menu.
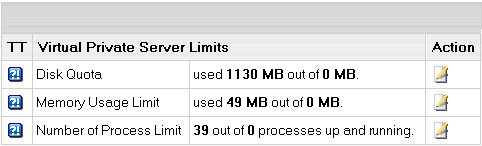
- To change a limit, click the Change icon in the corresponding Action section.
- On the page that appears, enter a new limit and click Submit.
|