|
Starting with 2.5 version, H-Sphere interface allows you to visualize load balanced server clusters. You can set
master-slave relations between servers in such clusters via admin CP.
Important: Before you create load balanced clusters of physical servers in admin CP, you need to
configure NetApp on related servers.
To combine H-Sphere physical servers in load balanced server clusters you need to perform the following
steps:
- Add physical servers to H-Sphere.
- Create server groups on these servers,
depending on their functionality. Servers that belong to the same cluster must have the same server group
created on them.
- Create master servers:
- In E. Manager menu choose P. Servers.
- On the page which lists physical servers click the needed server name. Turn Load Balance Server on:
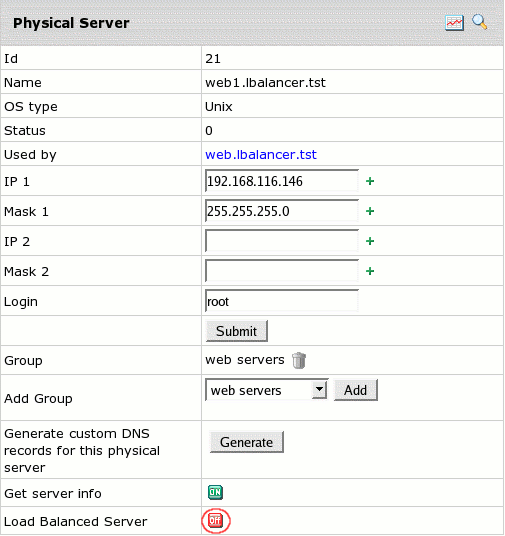
- On the Load Balanced Server page chose No master and click change.
- Add web or mail logical server group to each created physical server.
- Create slave servers. Enable Load Balanced Server for the rest of the servers choosing a master
server for them:

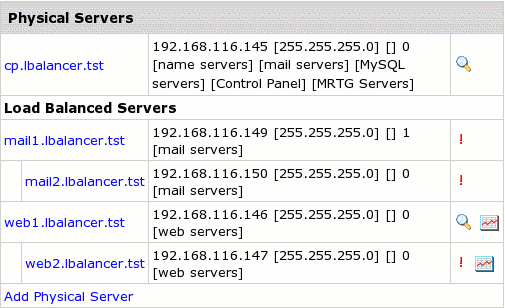
- As the result, on the Physical Servers page you should have load balanced clusters visualized
with master and slave servers clearly distinguished:
Important: Logical servers can't be created on slave servers.
Any number of slave mail servers can be created for master mail servers.
Multiple slave servers for load balanced Web servers has been implemented in H-Sphere 2.5 Beta 2 and up.
|