|
To associate a particular plan with a particular box:
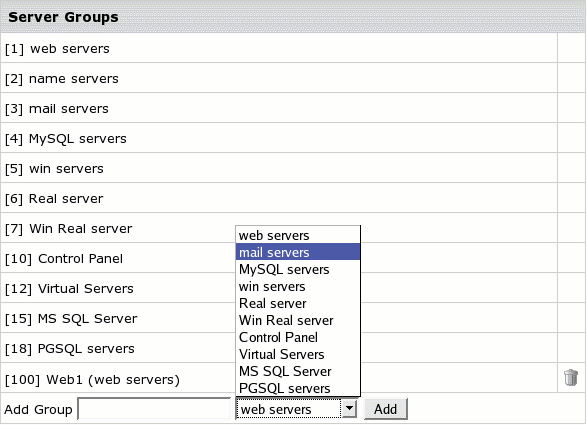
Step 1: Go to E.Manager -> Server Groups.
Create groups of servers for each type (web, mail, Real, MS
SQL etc.) of servers 'in charge' of the services that you
intend to include in the plan:

When added, they will show up in the numbered list.
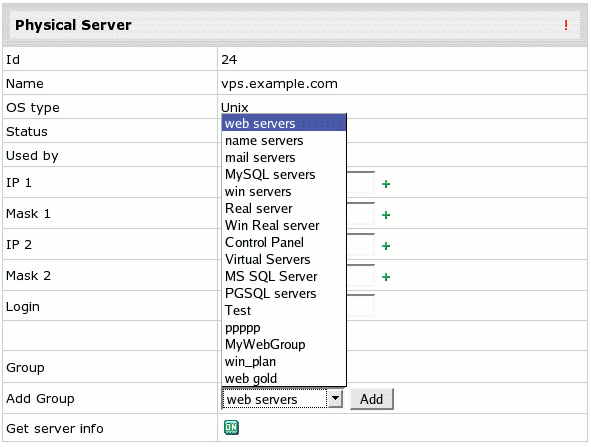
Step 2: Go to E.Manager -> P.Servers.
Click the name of this physical server. At the bottom of the
page that appears, select a group you have created:

and click the Submit button. The name of the group
will appear in the Group field. This means that this
group will now be located on this physical server. Perform
this procedure for each of the created server groups to get
all of them assigned to appropriate servers.
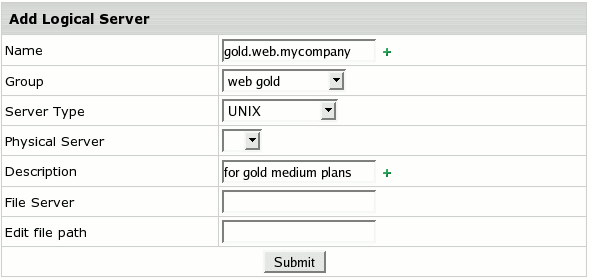
Step 3: On the Logical Servers page, click
the Add Logical Server link. On the page that appears,
enter its name (e.g. gold.web.mycompany) select the
group and this particular physical server which you assigned
it to on the previous step, define server type and choose
from the physical servers that have the same group. Finally,
you should get the form filled out in a similar way:

* File Server and File Path fields are reserved for future
implementations.
Submit the form.
Step 4: On the Logical Server settings page,
add the IPs that you want to use
for accounts registered at this logical server. Define their type.
Set shared IP tag.
Step 5: In the upper part of the same Logical Server
settings page toggle the Available for signup button
to ON.
Step 6: The same way create and configure new logical
servers for each type (web, mail, Real, MS SQL etc.) of servers
'in charge' of the services that you intend to include in
the plan, in case you want the appropriate resources, that your
users will enable, to be created on different boxes.
Step 7: Launch Edit/Creation Wizard for the plan that
you intend to place on particular servers. In each section
you will be prompted to select Logical Server Group where you
want to create the included type of resources. Select
the one assigned to that particular physical server:

Mind, these settings will not affect existing accounts. Only
new accounts will be created on the designated server.
|