|
This document explains how to have incoming mail queued on a relay mail server
while the master mail server is down or otherwise unable to receive mail.
For this, you need to do two things:
- mark the backup mail server as relay and
- allow relaying in the plan so that users can use the relay server
Every active mail server can be either relay or master+relay.
- master+relay means that (1) new mail domains will be created on this server and
(2) the server will receive mail for domains on other mail servers.
- relay (secondary queue server) means that new domains won't be created on
this server, but the server will relay mail for domains on other servers.
By default, all mail servers are set as master and relay, which is the recommended configuration.
If you don't want to use a server with new domains (neither host new domains
nor relay mail for them), make it
unavailable for signup.
To change the role of a mail server at the system level:
- Log into the control panel as admin.
- In E.Manager, select the mail server.
- At the bottom of the form that appears, choose server role from the drop-down box.

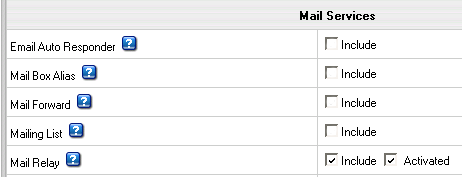
You can allow or disallow relaying mail for a specific plan. With relaying allowed, mail to
accounts under this plan will be queued on other servers when their mail server is down.
- Log into the control panel as admin.
- Select Info->Plans.
- Choose the plan.
- On the first step of the wizard, check Include for Mail Relay.

If mail relays are allowed in the plan, users can choose a relay server for a specific account
in their User control panel.
If the server is down, mail for this account will be queued on this relay server.
- Log into this account.
- Go to Mail Info menu.
- Turn Mail Relay on.
This will add an MX record for the server that was set as relay.
|